Software Guides to Remove OneDrive Duplicate Files
-
Table of Content
- Software Working Process
- Pre-Requisites
- Activation Guide
- Installation & Uninstallation
- User Interface
Software Working Process
Software Working Process
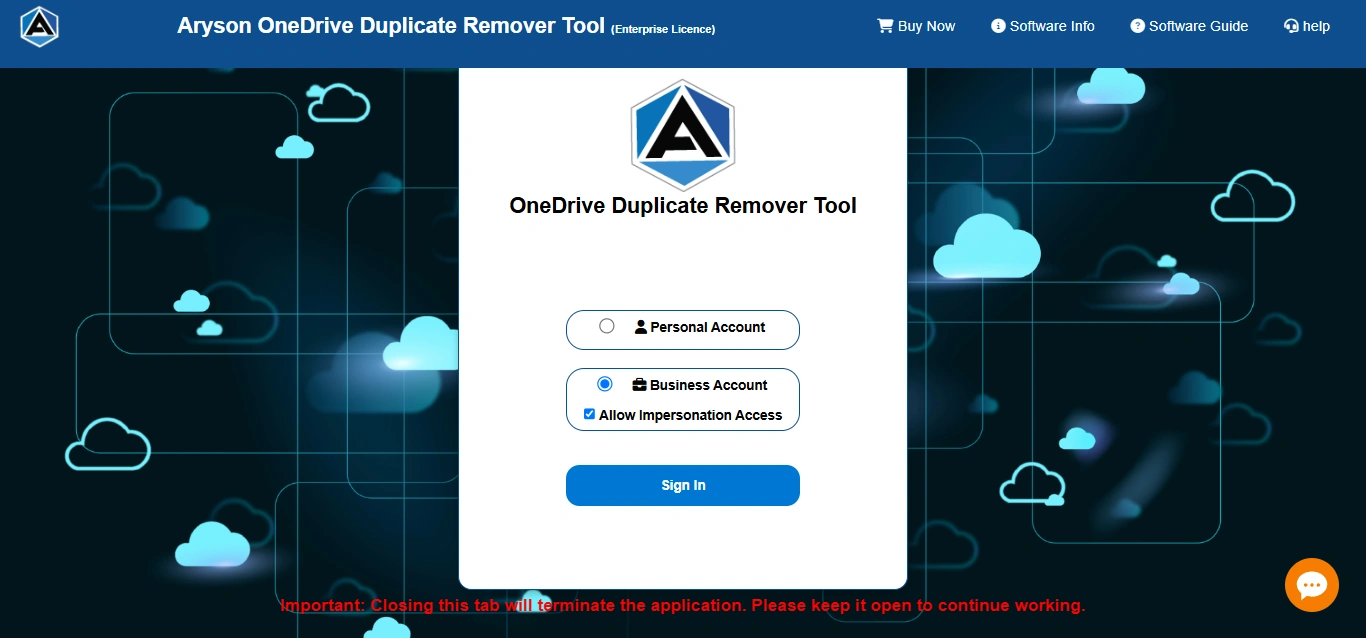
Step 1: First, install and run the Aryson OneDrive Duplicate Remover Tool as an administrator on your computer. The software will redirect you to the default browser.

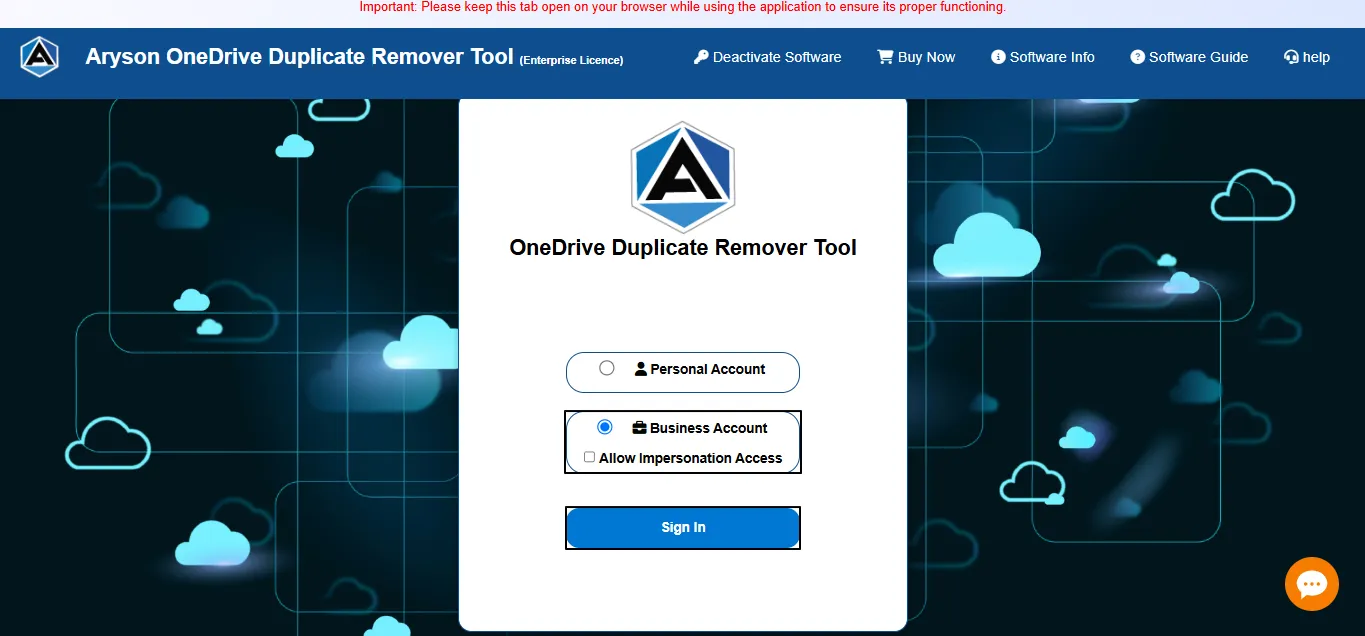
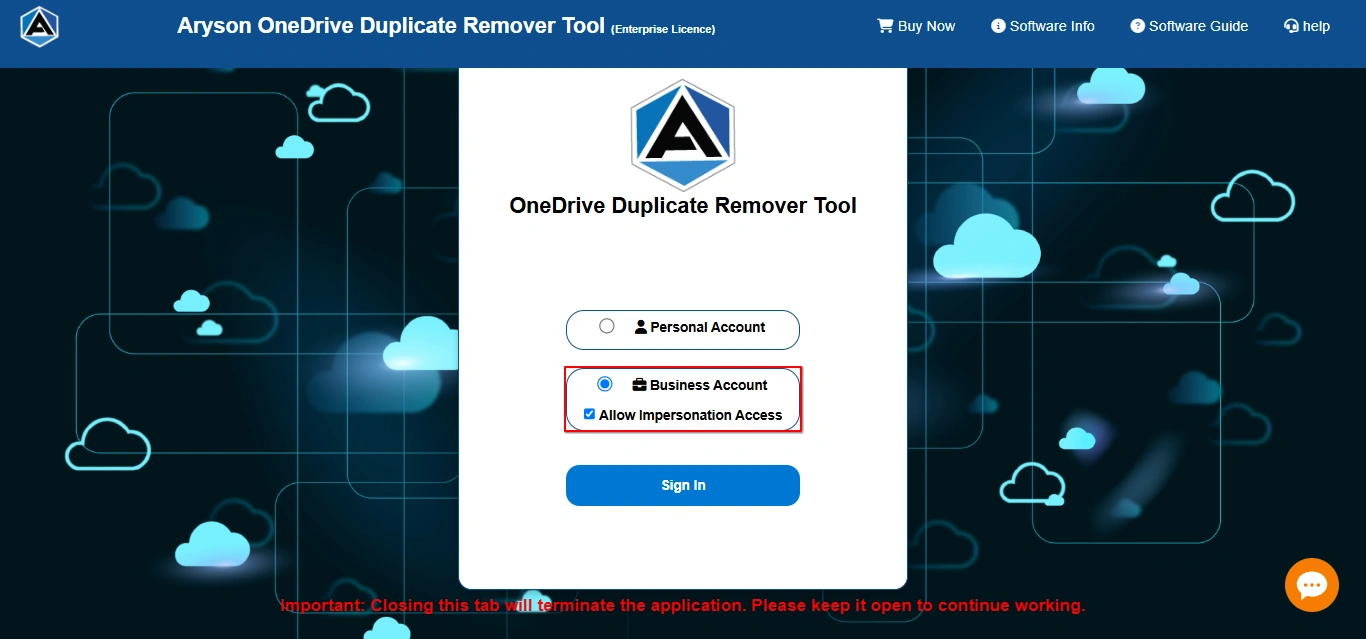
Step 2: After that, select one of the account types that you need to use: Personal Account or Business Account. Click Sign In.
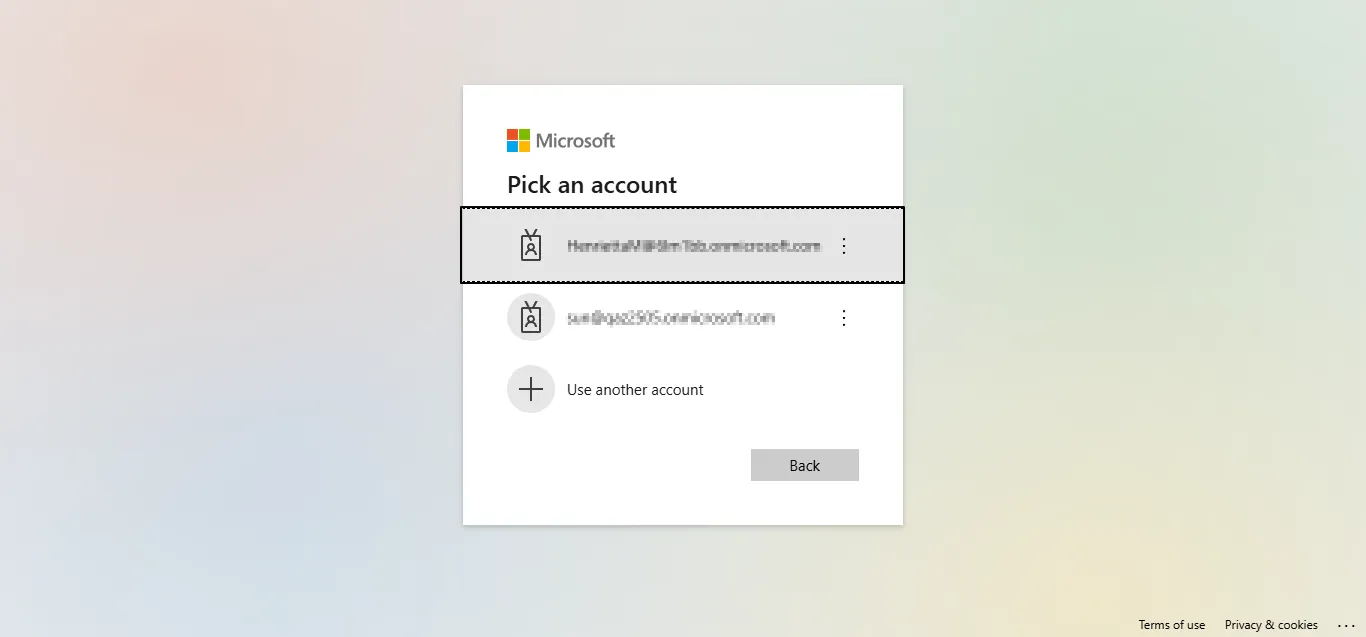
Step 3: Now, enter your valid credentials to log in and verify yourself.
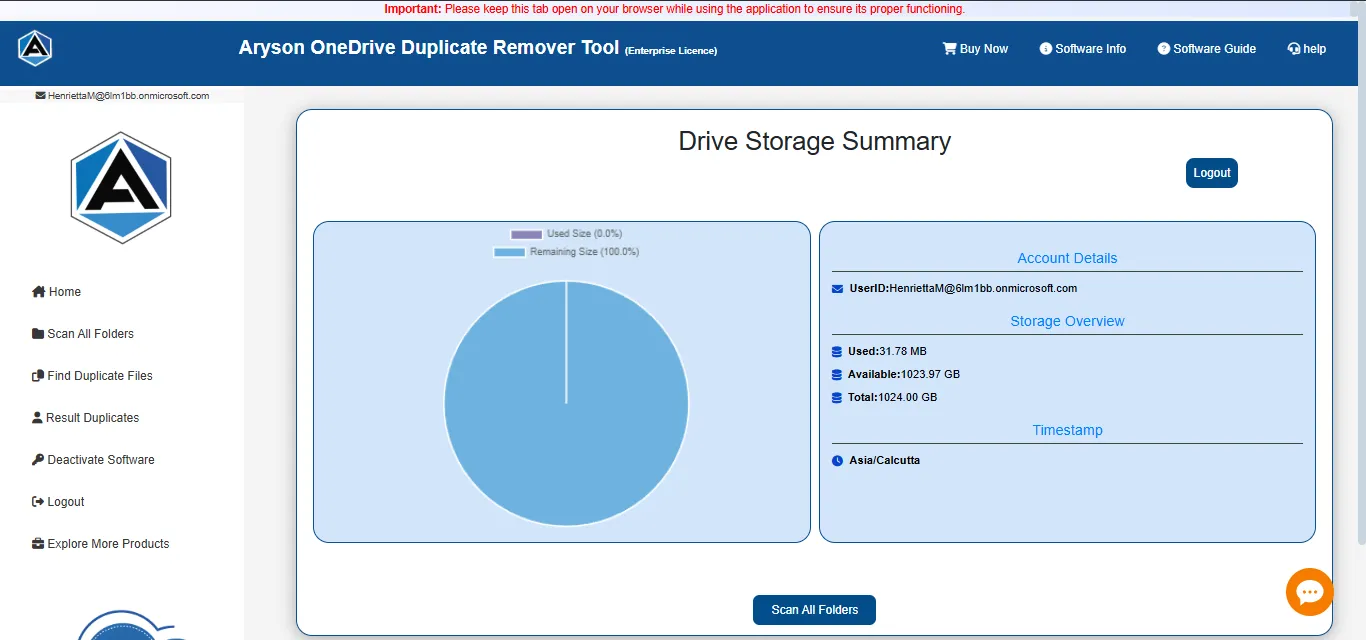
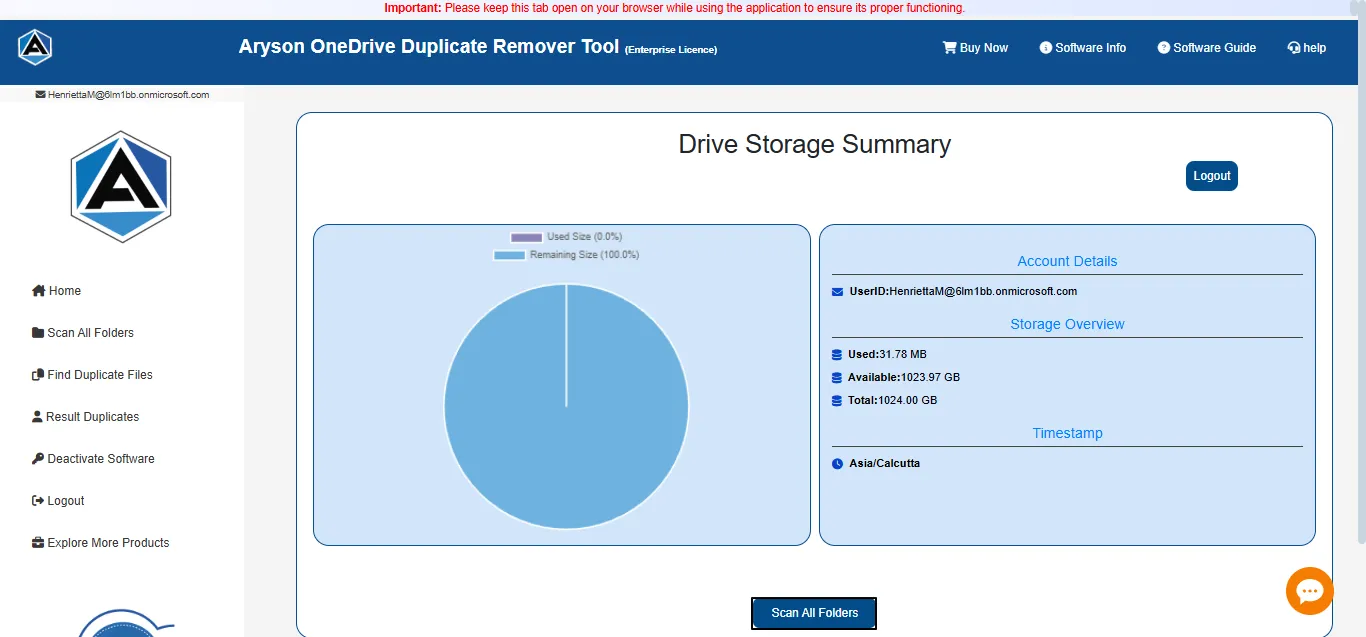
Step 4: Here, you can see the Drive Storage Summary for your desired account. You can preview your account details, storage, and TimeStamp.
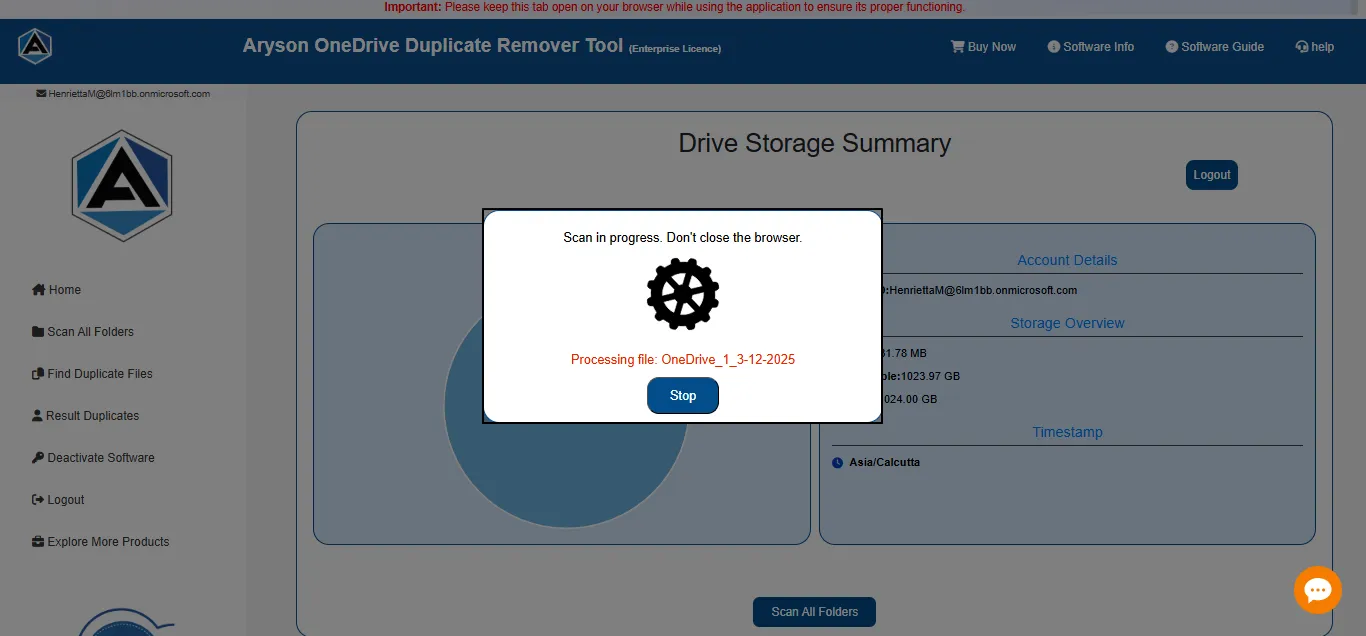
Step 5: Now, click on the Scan All Folder option to start the scanning process of your duplicate files.
Step 6: Here, you can wait here while the tool manages the storage and ensure everything is properly processed.
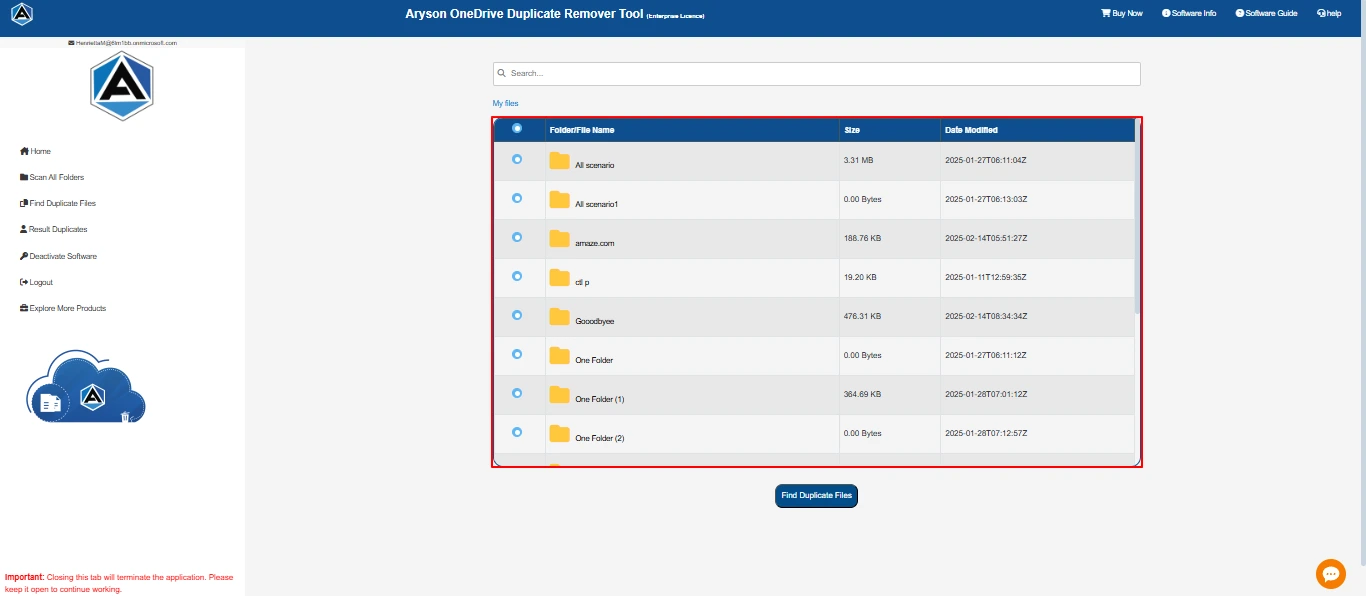
Step 7: Now, you see a preview of all the files and folders associated with the respective account.
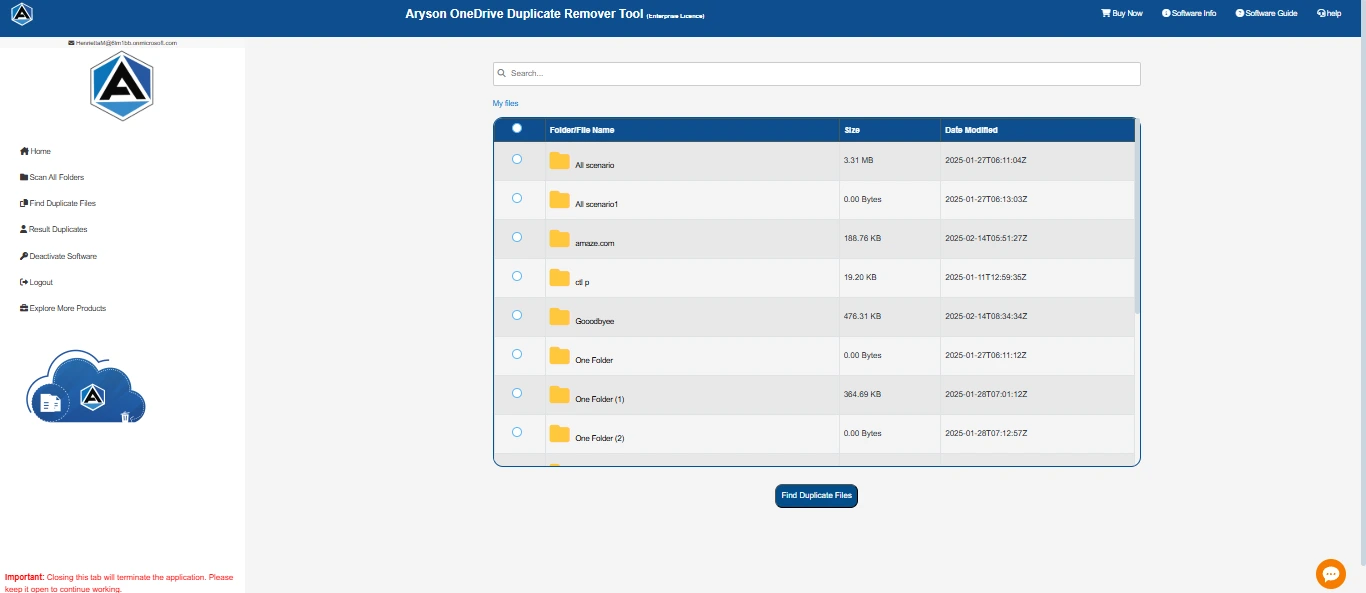
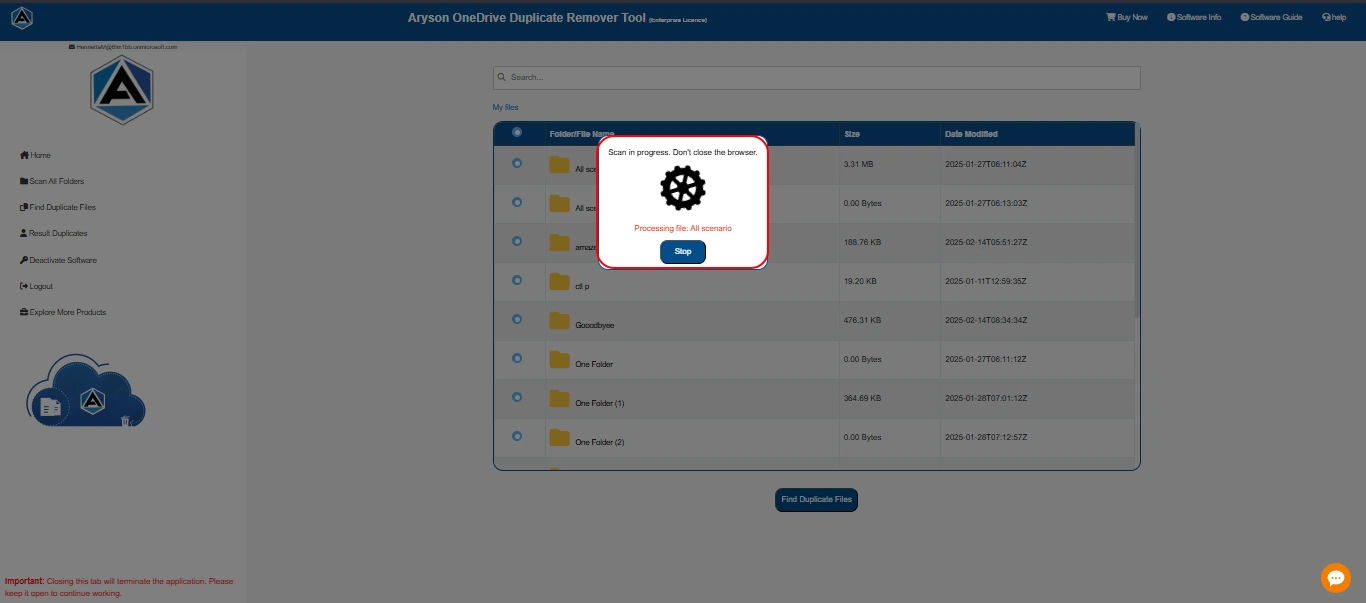
Step 8: Here, you can select the desired file to search for duplicate files in the chosen folder. Click Find Duplicate Files.
Step 9: You can wait here while the tool finds duplicate files.

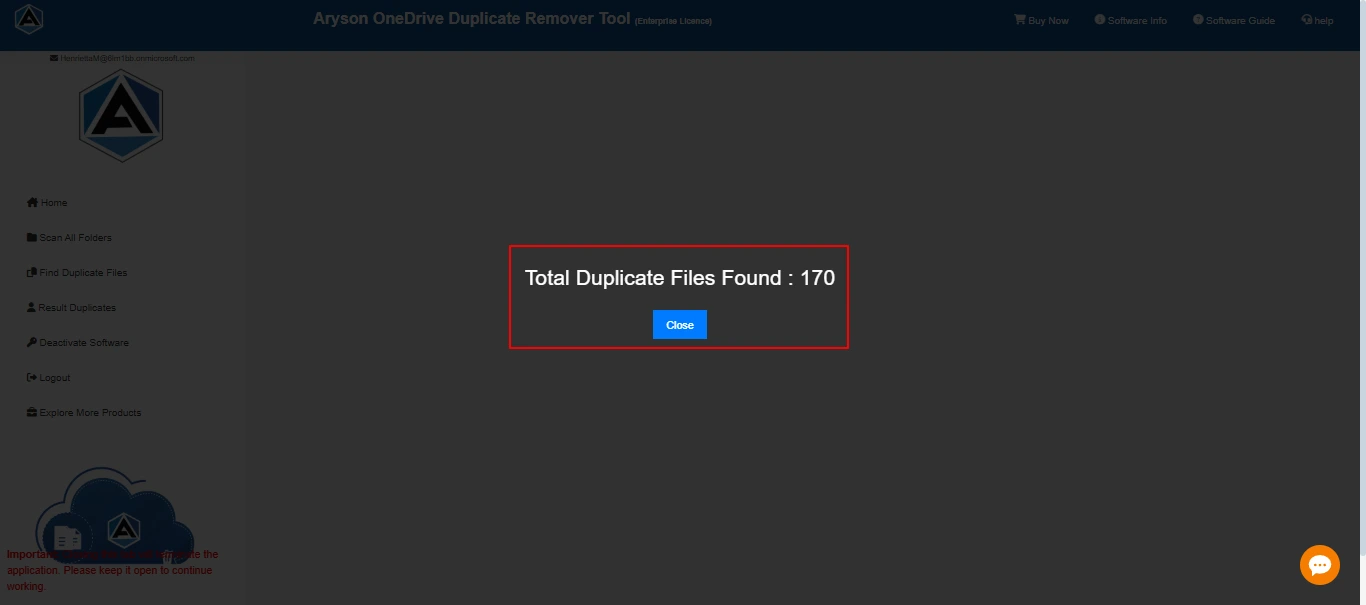
Step 10: Then, a pop-up message will appear showing the Total Number of Duplicate Files and Groups associated with your folder.
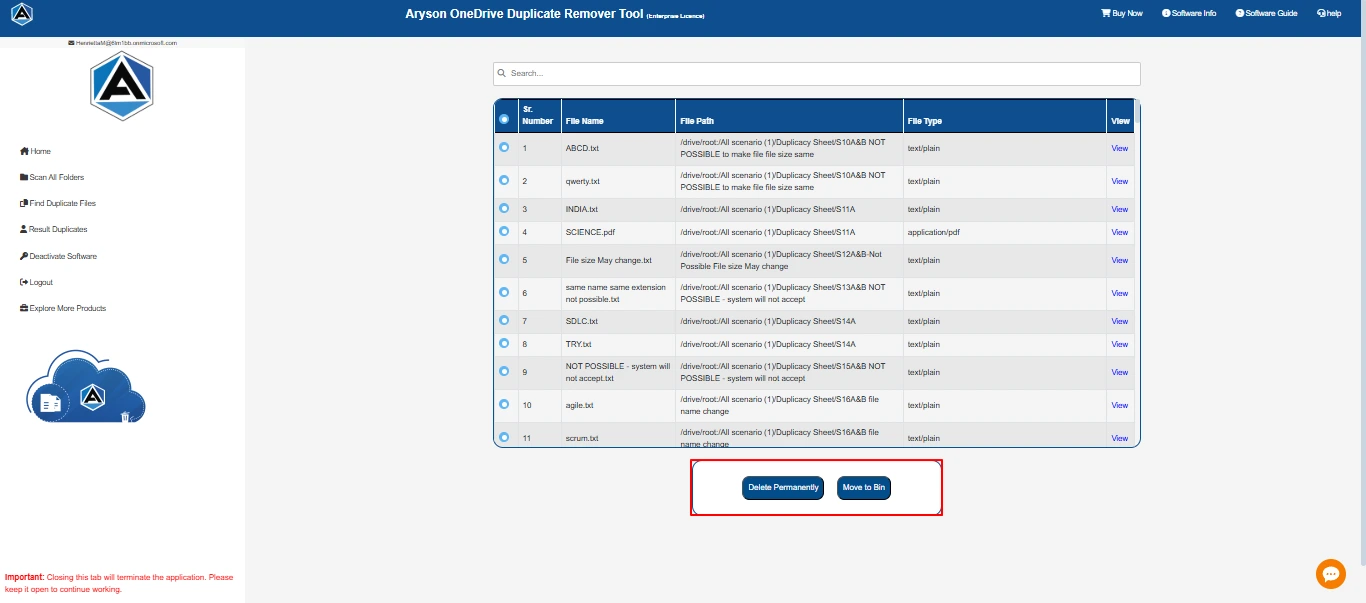
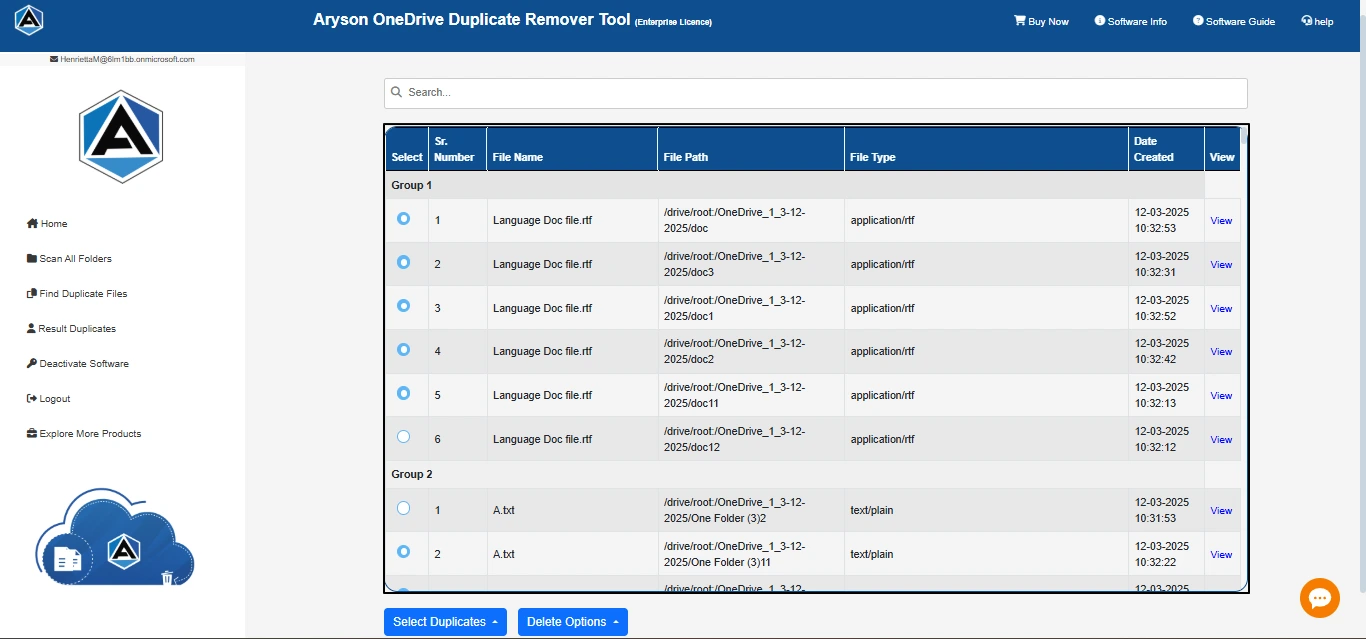
Step 11: In the next panel, all the duplicate files will be displayed for review and management.
Step 12: Next, Under Select Duplicates you see several options:
- Retain the newest file in each group: Using this feature, the user can select all duplicate files, excluding the most recent one, based on a time-based sorting method.
- Retain the oldest file in each group: Using this feature, the user can select all duplicate files, excluding the oldest one, based on a time-based sorting method.
- Unselect All: This feature allows users to deselect all previously selected duplicate files.
Note: For custom selection of duplicate files, the user can manually choose by simply clicking on the hover option.
The tool also provides a View option, allowing you to verify your data before deleting it. This ensures that the correct data is processed, reducing the risk of data loss and errors.

Step 13: In the last segment of this tab, you will see the two options:
- Delete Permanently: By using this option, you have permanently removed your duplicate file from the account.
- Move to Bin: By this option, you move your duplicate file to the bin. This means you can remove your duplicate file temporarily.

Step 14: Next, select the duplicated files based on your preferences and sorting criteria.
Step 15: Here, select the delete option according to your preference.
Step 16: After that, a pop-up will verify your permission to delete the file, either permanently or temporarily. Click OK

Step 17: Wait a moment while the tool deletes the duplicate file from your selected account and folder. After that click OK.
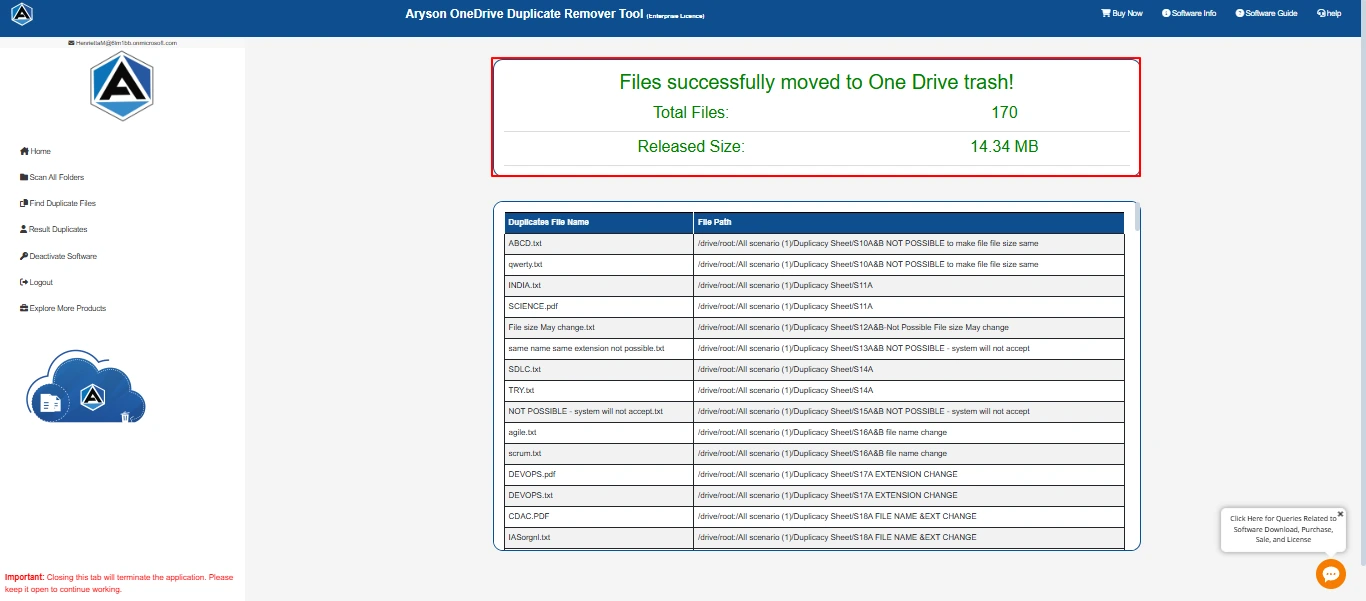
Step 18 : 18: After performing one of the actions, the software will display the results.
- Total files: The number of files you removed.
- Released size: Total size of your disk being free.
- Duplicate File Name: Name of each file that is identified as a duplicate.
- File Path: The location associated with the duplicate files.
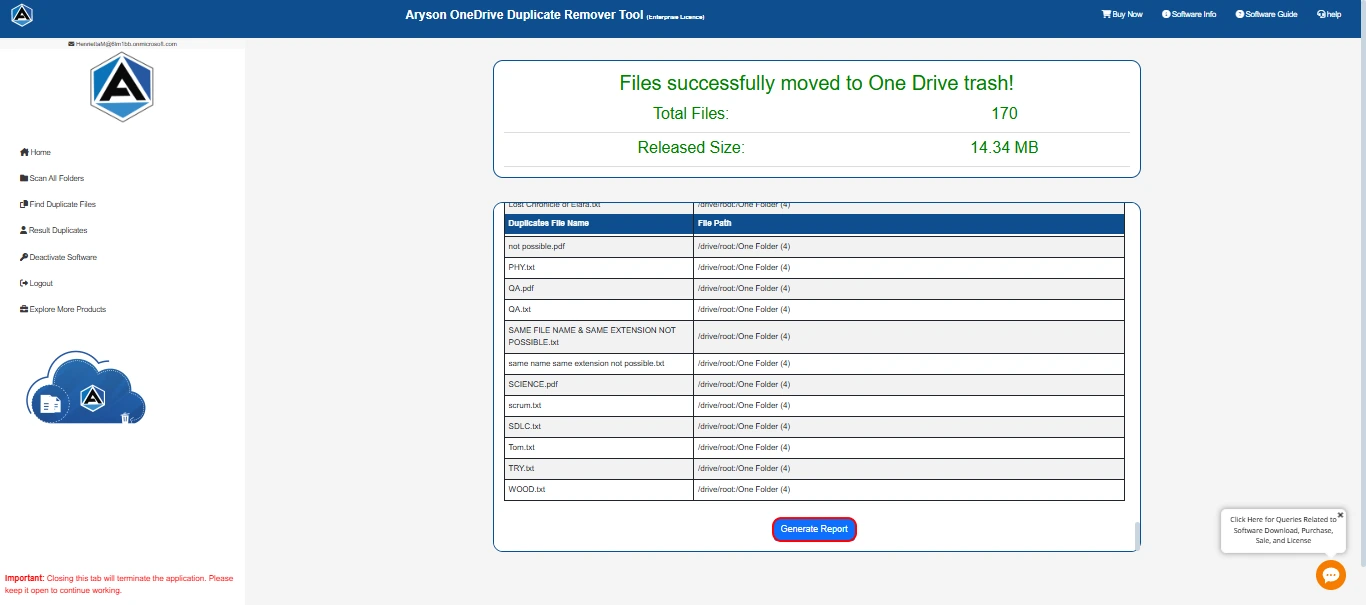
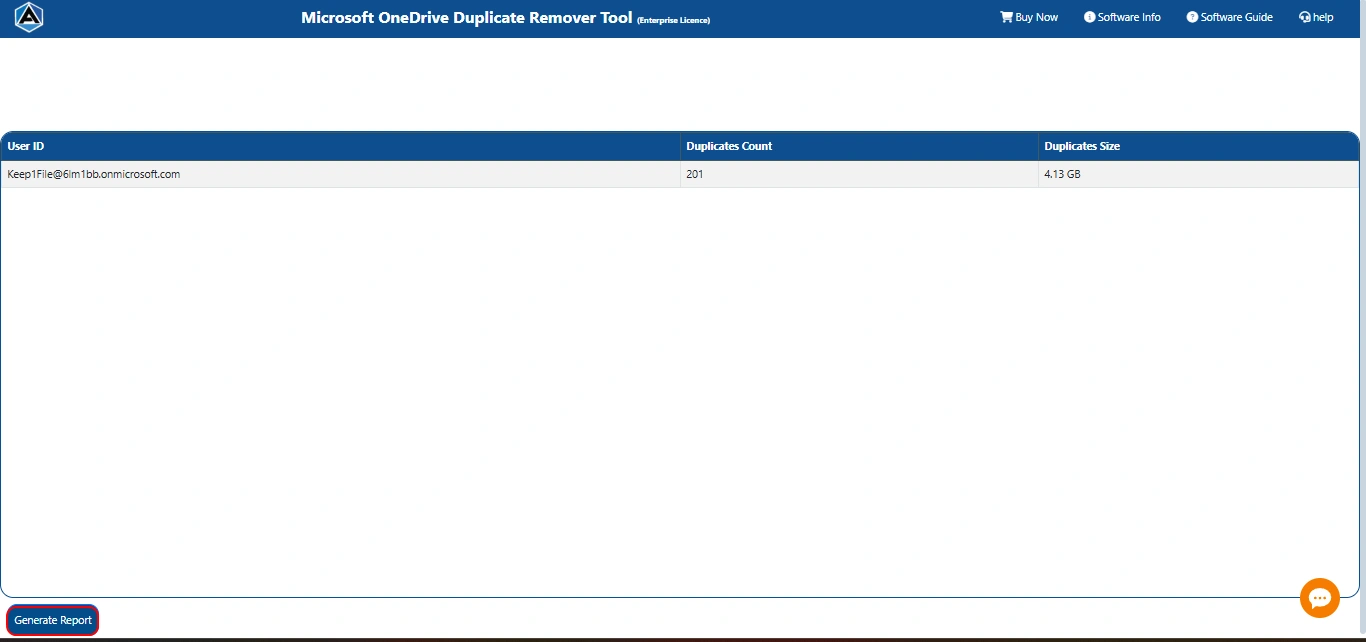
Step 19: Additionally, you can opt for a Generate Report. By this, you can summarize all the documentation of your account.

Step 20: Afterward, a pop-up will appear displaying the status of your report generation.
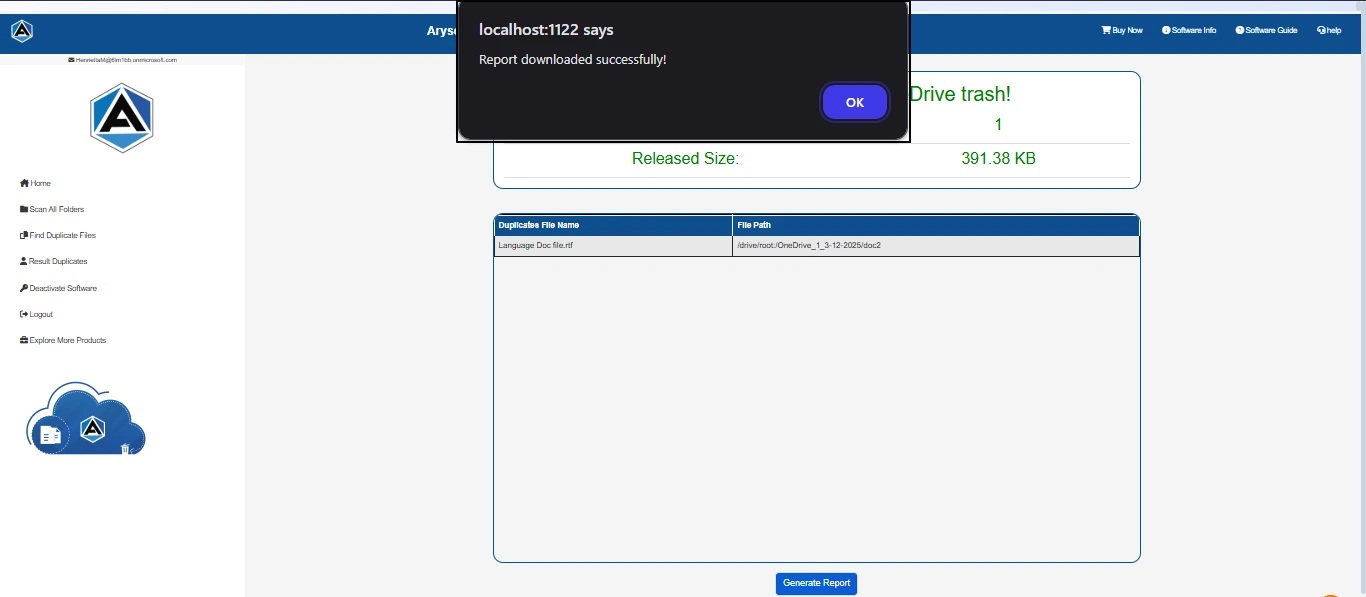
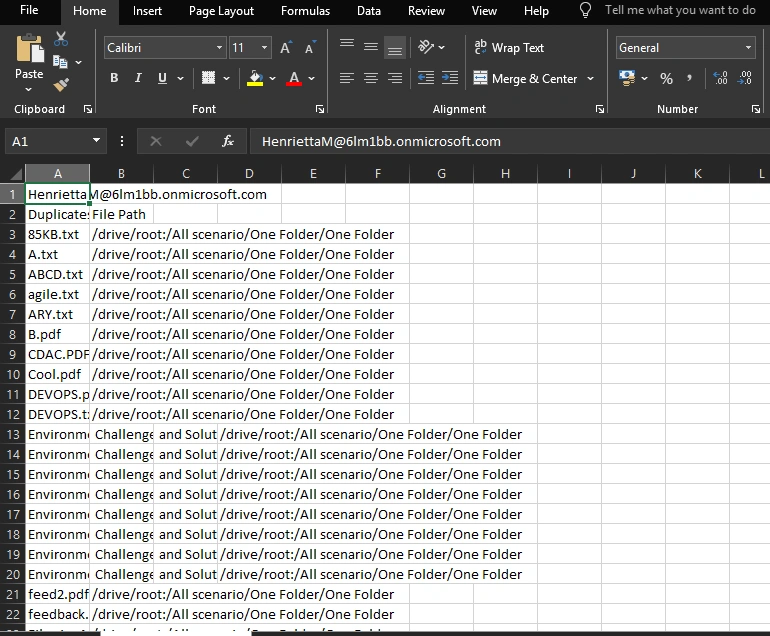
Step 21: In the end, you can see your report in an Excel sheet.

Step 1: Download and install the OneDrive Duplicate Remover Tool on your system. Run as an administrator.
Step 2: After that, choose the option of Business Account and check Allow Impersonation Access.
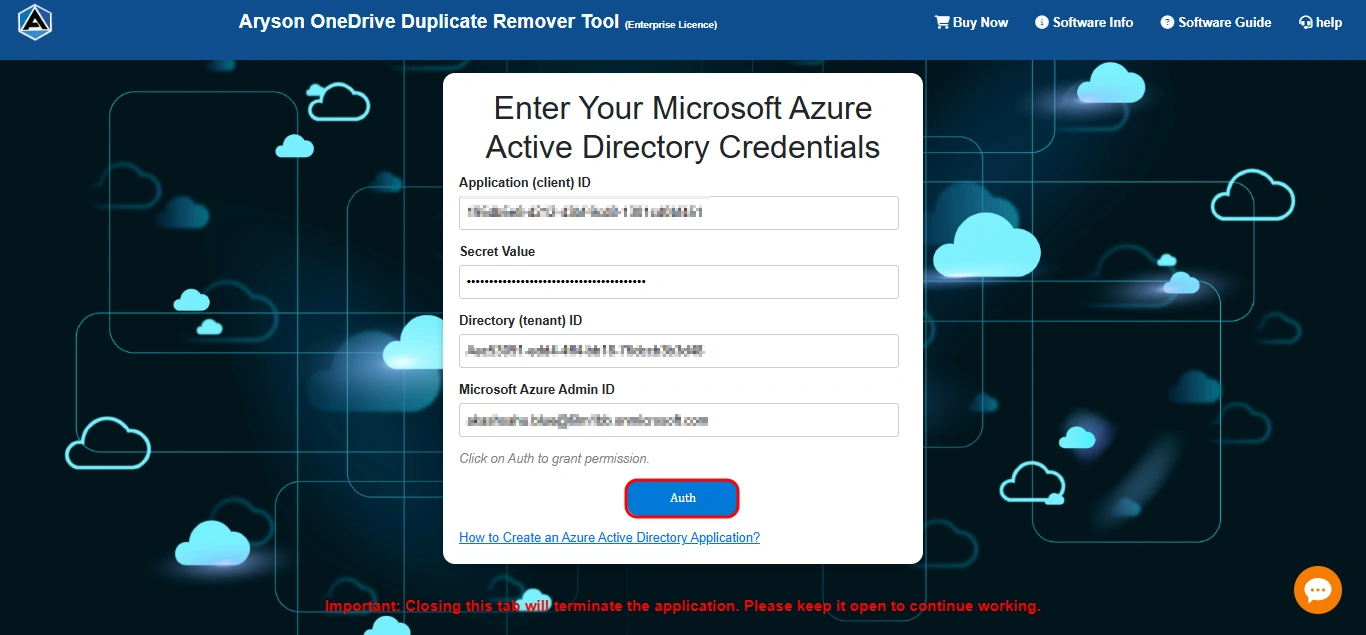
Step 3: Next, enter your Microsoft Azure Active Directory Credentials in the given panel.
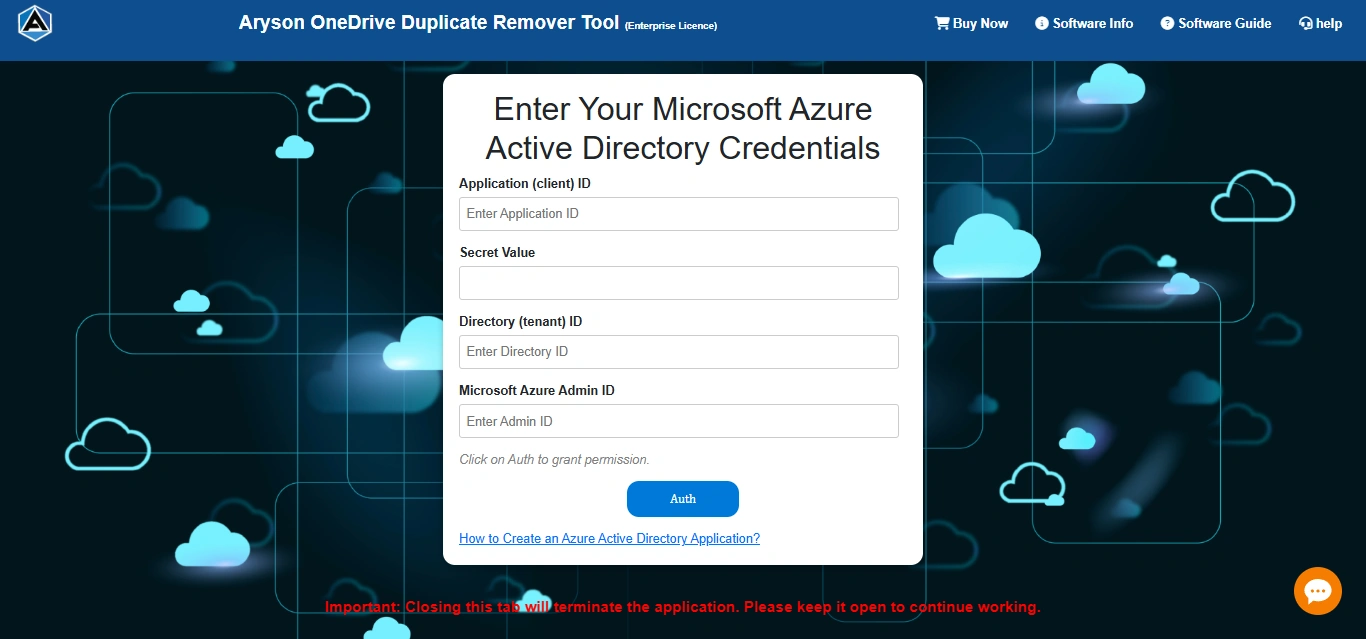
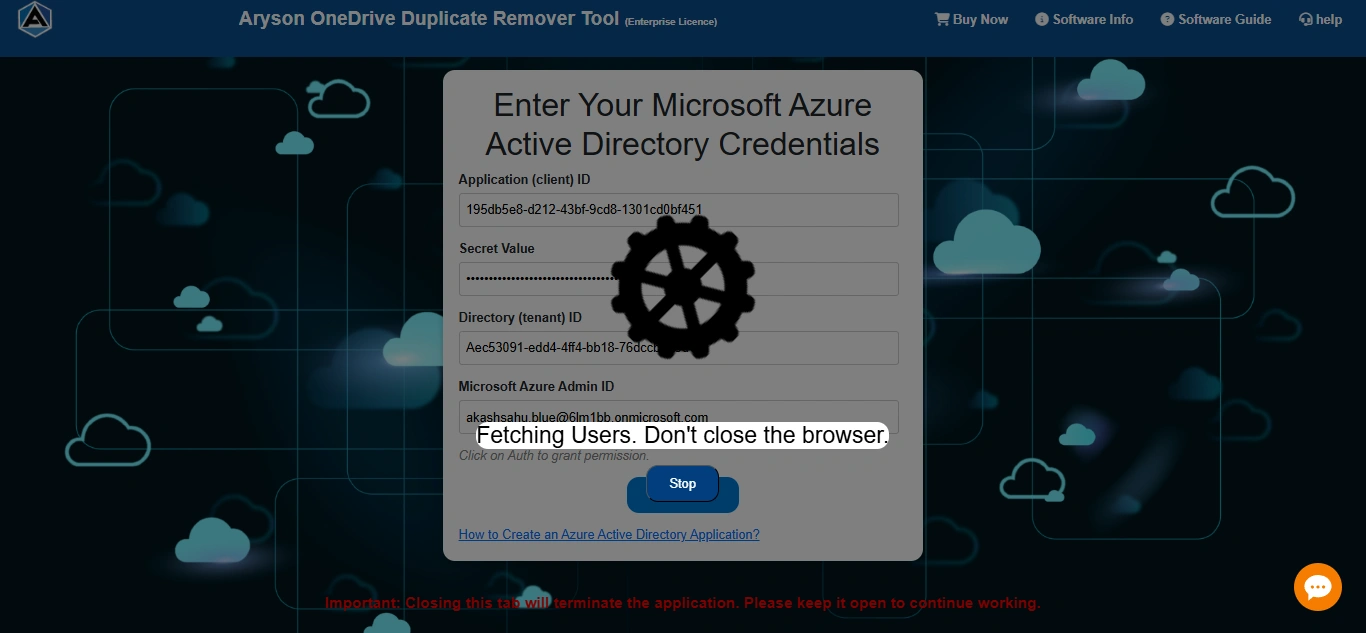
Step 4: After entering all the details, kindly click on the Auth button to authenticate.
Step 5: Next, please wait while our system authenticates you with your credentials.
Step 6: Next, you will be able to view all the accounts associated with it.
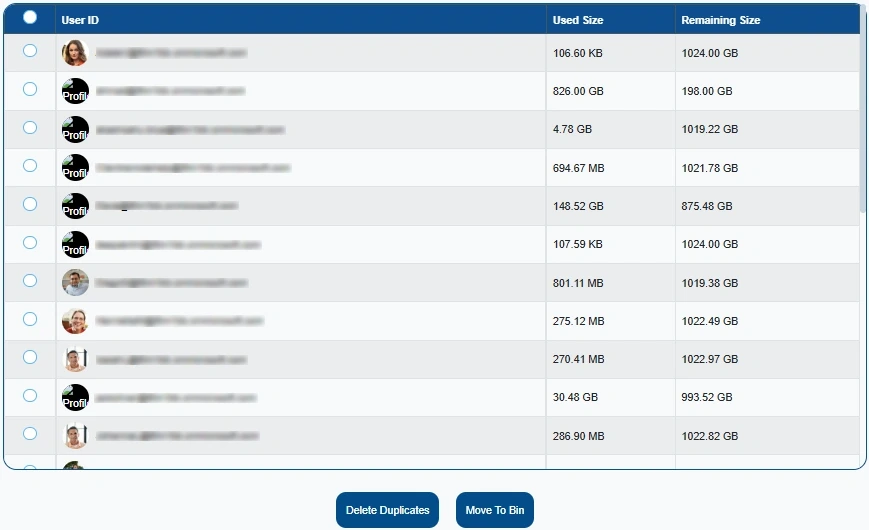
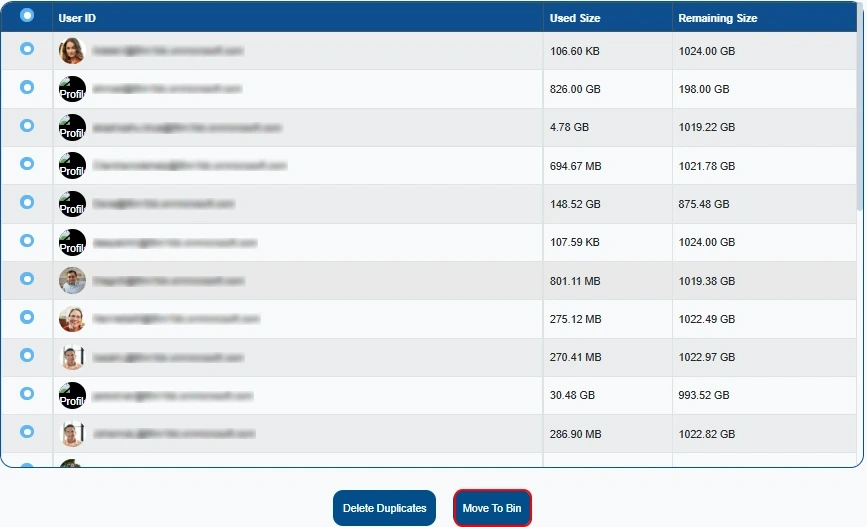
Step 7: Here, you can select the account from which you want to delete the duplicate file, folder, or data.

Step 8: After that, choose the option to either Move To Bin or Delete Duplicates, depending on your needs.
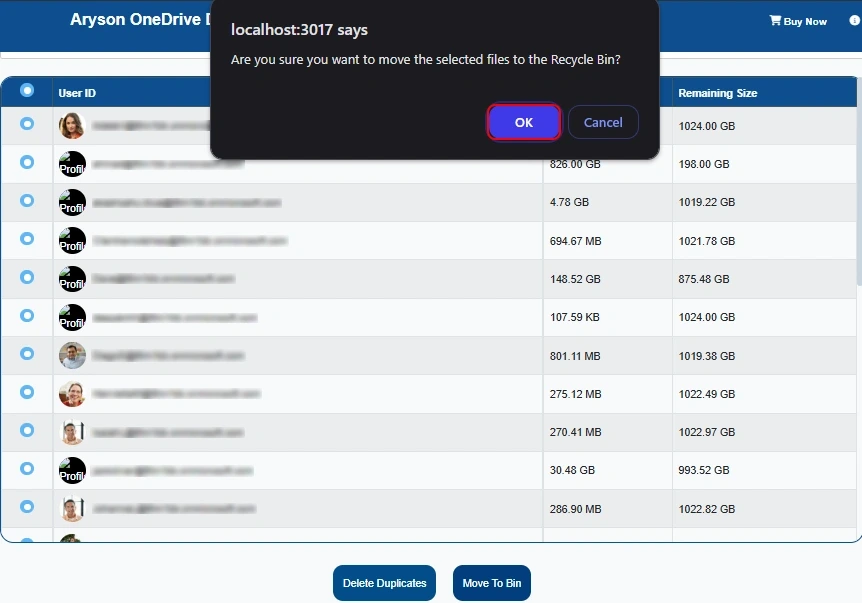
Step 9: Then, a pop-up message will appear asking for your permission.
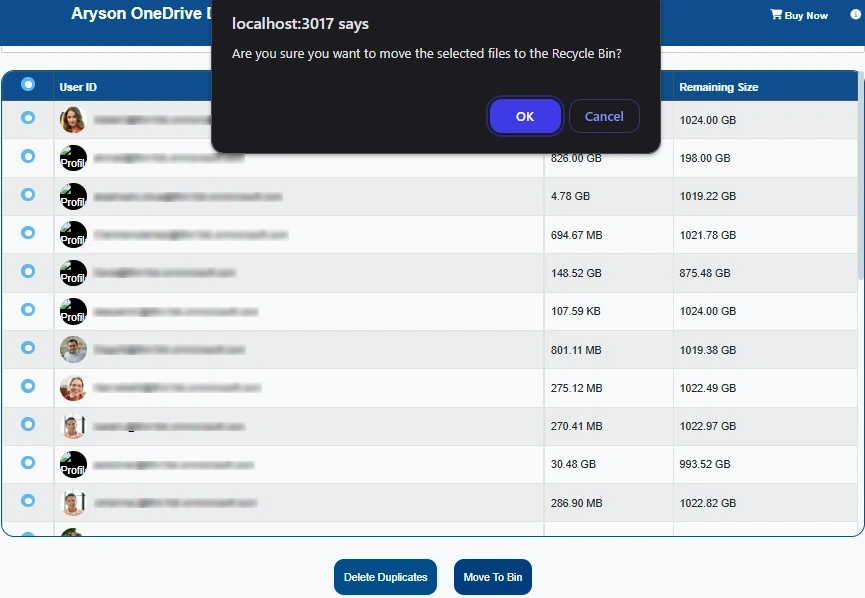
Step 10: Here, click the OK button to grant permission to move the duplicate files to the Bin.
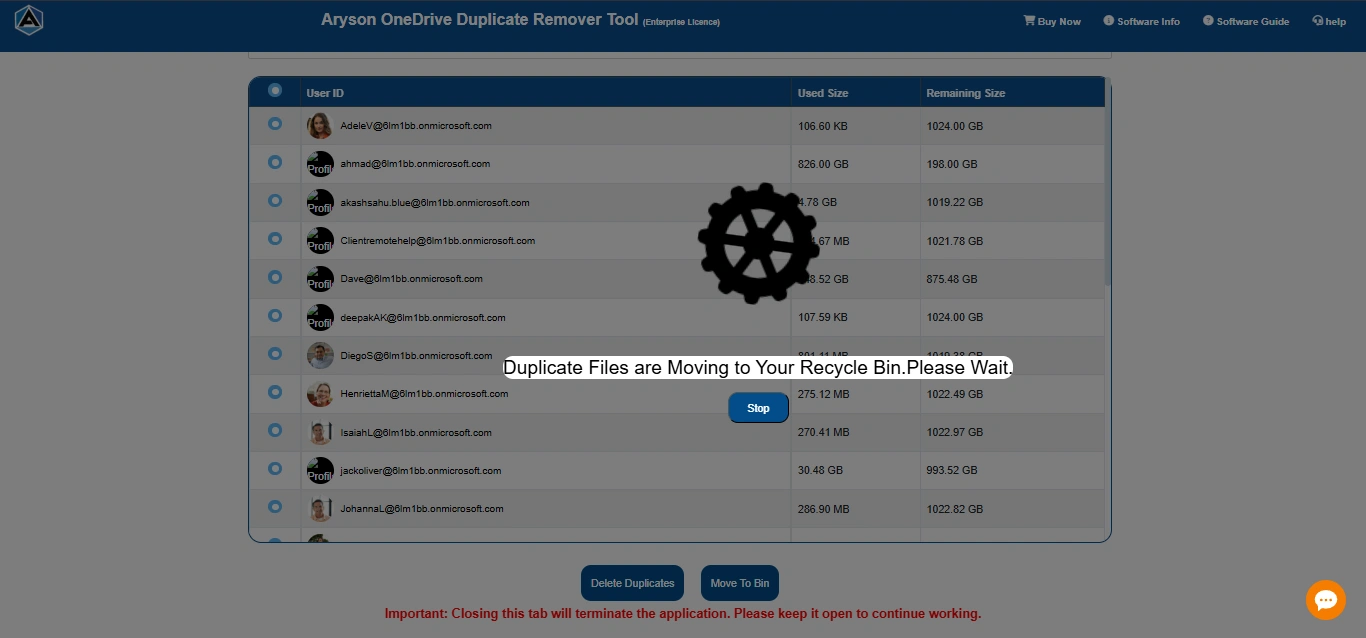
Step 11: Now, please wait while the system processes the data in your account.
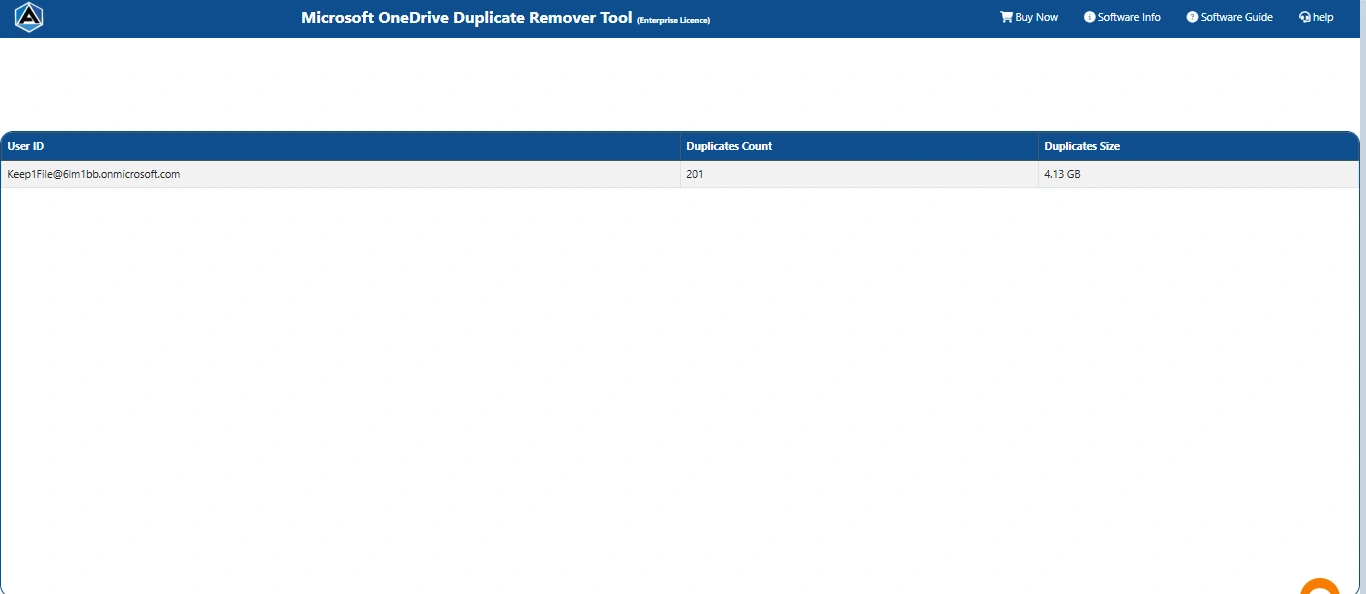
Step 12: After that, the system will display the count of duplicate files and their total size.
Step 13: Next, you can also generate a report of the data that has been removed.
Step 14: In the end, the report will be in an Excel sheet. Open it to analyze the details.
Software Working Video
Pre-Requisites of One Drive Duplicate Remover
General Requirements:
- The user must have a valid Personal or Business OneDrive account.
- Ensure that your Personal or Business OneDrive account is logged in on your default web browser.
- If using Impersonation Mode for Business account to remove duplicates from multiple sub-users, the following Microsoft Azure Active Directory Credential details are required:
- Application Client ID
- Secret Key
- Tenant ID
- Admin ID
- The OneDrive account must contain duplicate files; otherwise, the tool will display “No duplicate files found”.
Browser Requirements:
- A stable internet connection is required.
- The software runs on the web browser.
Activation Guide
Activate the Software
Installation & Uninstallation
Installation & Uninstallation of Software
User Interface
User Interface
After downloading the Aryson Onedrive Duplicate Remover Tool, you will find the welcome screen as played below.
