Software Working Process
Step 1: Open Google and Search for the Microsoft Azure Portal.

Step 2: Click on the First Result that appears in the Google Search Results. You can Directly Click on https://azure.microsoft.com/en-us/get-started/azure-portal

Step 3:The Microsoft Azure Portal will appear in front of you. Click on the Sign In button at the Top-Right Corner of the Page.

Step 4: Now Enter your Microsoft Admin ID and click on the Next button.

Step 5: Provide your Password and click on the Sign In button.

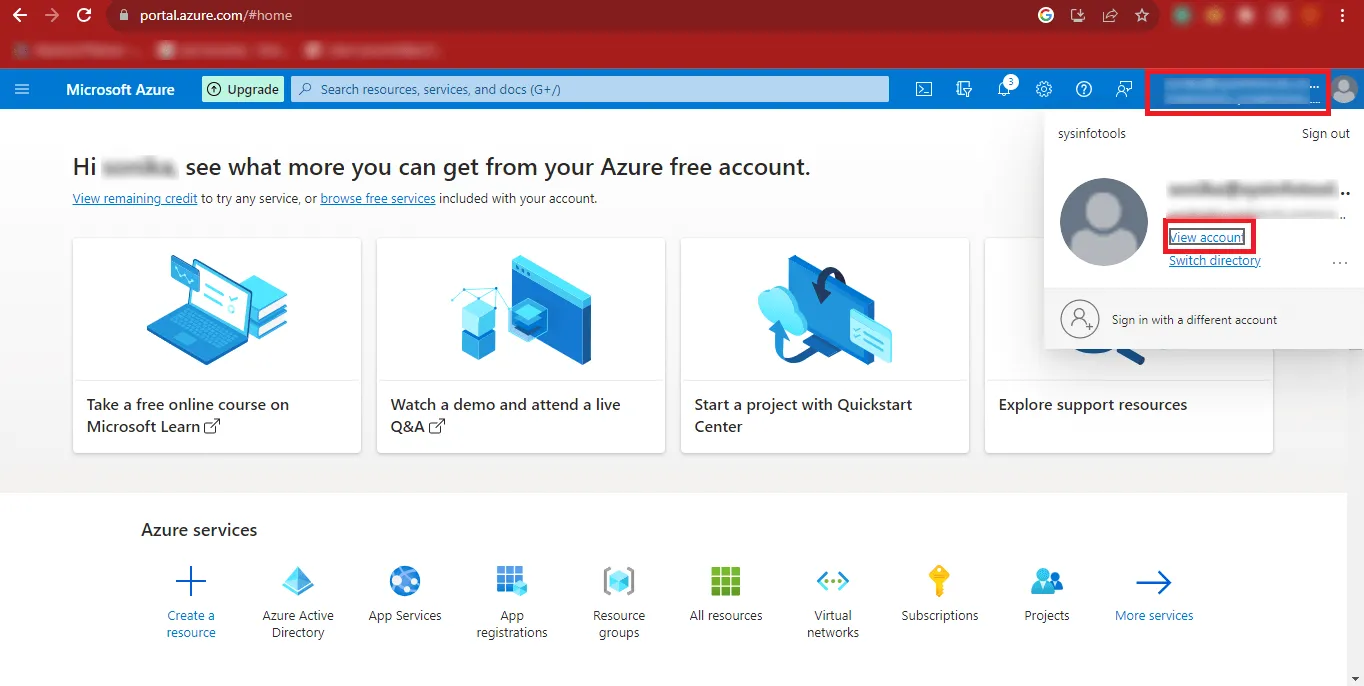
Step 6: Then you will have to click on the User ID at the top-right corner of the Page and click on the View Account Link.
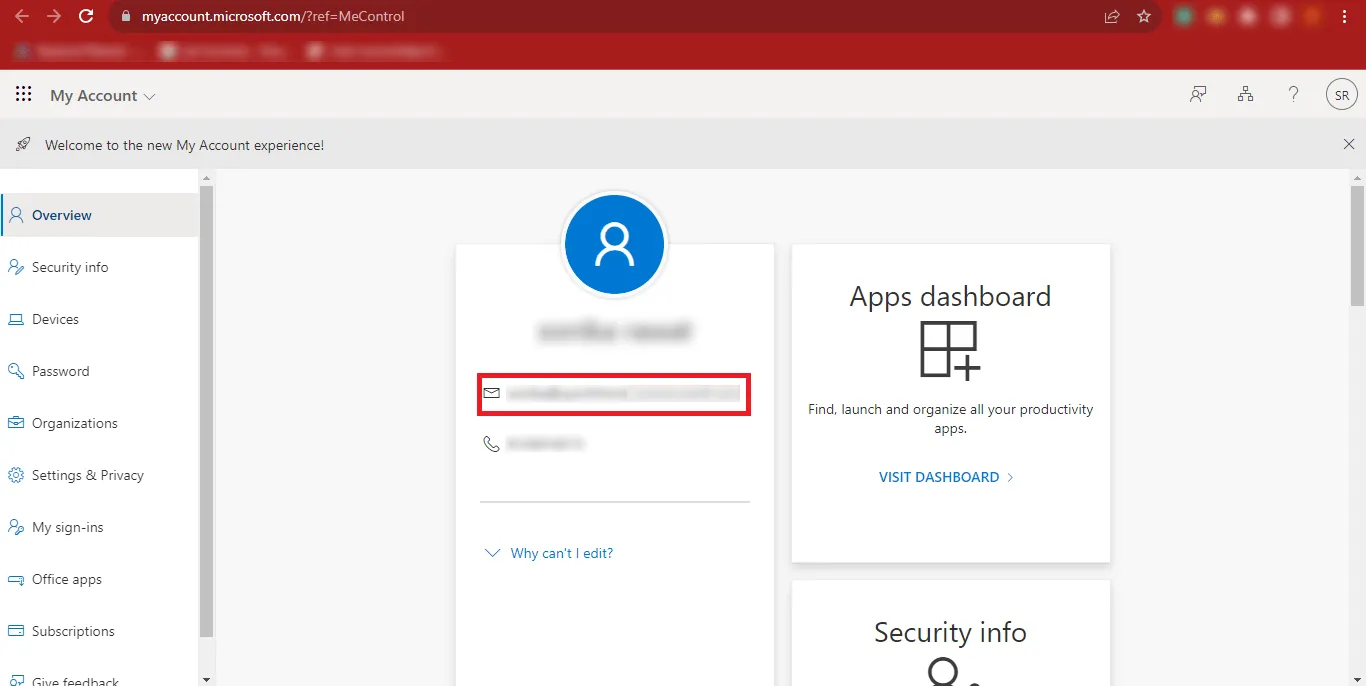
Step 7: Copy your Admin ID and Paste it at a Safe Location.
Step 8: Return back to the previous page and click on the Three Bars at the Top-Left Corner of your Page.

Step 9: Then click on the Azure Active Directory option.

Step 10: Now the Azure Portal will appear on your screen.

Step 11: Click on the Add option and once it expands, click on the App Registration Option.

Step 12: Now enter the desired name you want to give in the Name Box and Mark the Third Option i.e. “Accounts in any organizational directory (Any Azure AD directory - Multitenant) and personal Microsoft account (e.g. Skype, Xbox)” option. Click on the Register Button to Continue.

Step 13: Now you can see the Given Name, Application (client) ID, Directory (tenant) ID, and other details. Copy the Application (client) ID and Directory (tenant) ID and paste them at a safe place.

Step 14: Then click on the Certificates & Secrets option on the left side of the page and click on the New client secret option.

Step 15: In the Description Box enter any name you want to enter and click on the Add button.

Step 16: After the above step, your Value will be created. Click on the Copy Icon and paste the Value at a Safe Place.

Step 17: Click on the API Permissions option and in the Configured Permissions Section click on Add a Permission.

Step 18: Now Click on Microsoft Graph in the Request API permissions Panel.

Step 19: Now you will have to give the Delegated Permissions and Application Permissions.

Step 20: Search the following Permissions as Given in the Table below and Add them.

Delegated Permissions
| API/Permissions Name | Description | Admin consent required | Status |
|---|---|---|---|
| DelegatedPermissionGrant.ReadWrite.All | Manage all delegated permission grants | Yes | Granted for Project |
| Directory.Read.All | Read directory data | Yes | Granted for Project |
| Directory.ReadWrite.All | Read and write directory data | Yes | Granted for Project |
| Files.Read | Read user files | No | Granted for Project |
| Files.Read.Selected | Read files that the user selects (preview) | No | Granted for Project |
| Files.Read.Write | Have full access to user files | No | Granted for Project |
| Files.ReadWrite.All | Have full access to all files user can access | No | Granted for Project |
| Files.ReadWrite.AppFolder | Have full access to the application's folder (preview) | No | Granted for Project |
| Files.ReadWrite.Selected | Read and write files that the user selects (preview) | No | Granted for Project |
| Group.ReadWrite.All | Read and write all groups | Yes | Granted for Project |
| Sites.Read.All | Read items in all site collections | No | Granted for Project |
| User.Export.All | Export user's data | Yes | Granted for Project |
| User.Manageldentities.All | Manage user identities | Yes | Granted for Project |
| User.Read | Sign in and read user profile | No | Granted for Project |
| User.Read.All | Read all users' full profiles | Yes | Granted for Project |
| User.ReadBasic.All | Read all users' basic profiles | No | Granted for Project |
| User.ReadWrite | Read and write access to user profile | No | Granted for Project |
| User.ReadWrite.All | Read and write all users' full profiles | Yes | Granted for Project |
Application Permissions
| API/Permissions Name | Description | Admin consent required | Status |
|---|---|---|---|
| Files.ReadWrite.All | Read and Write files in all site collections | Yes | Granted for Project |
| User.Export.All | Application Export user's data | Yes | Granted for Project |
| User.Invite.All | Invite guest users to the organization | Yes | Granted for Project |
| User.Manageldentities.All | Manage all users' identities | Yes | Granted for Project |
| User.Read.All | Read all users' full profiles | Yes | Granted for Project |
| User.ReadWrite.All | Read and write all users' full profiles | Yes | Granted for Project |
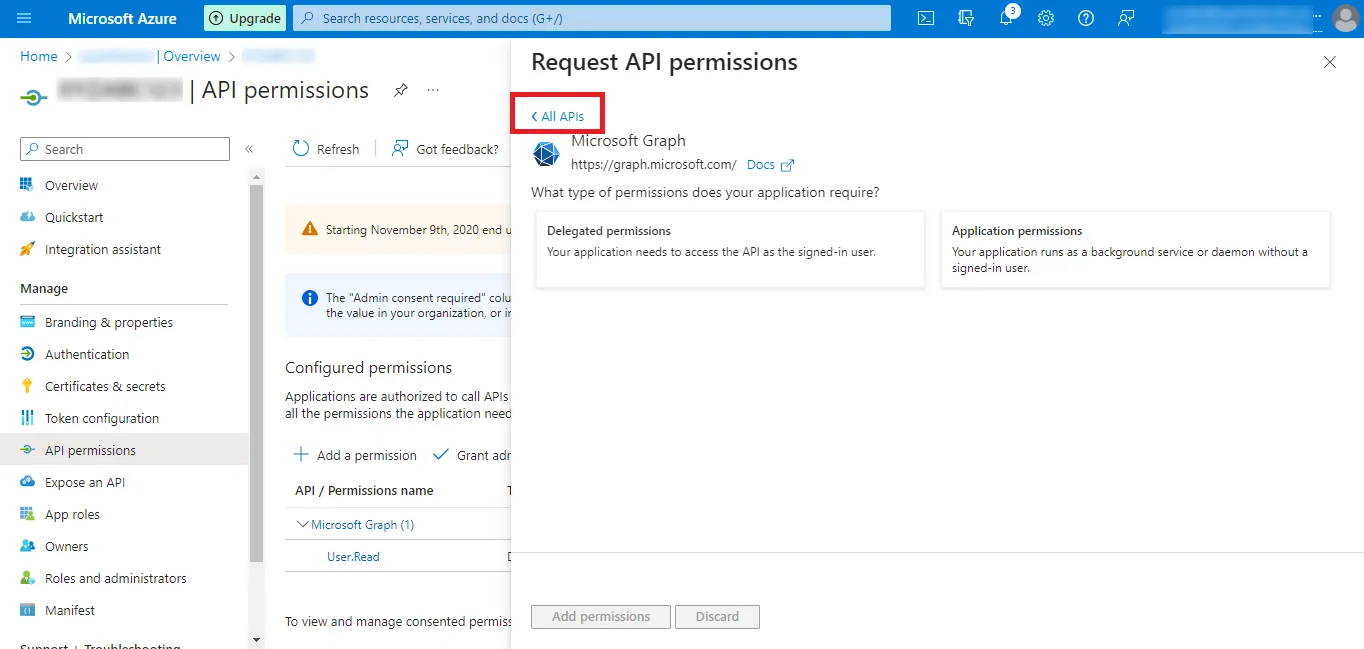
Step 21: Then Click on All APIs and go to the previous step for more permissions.
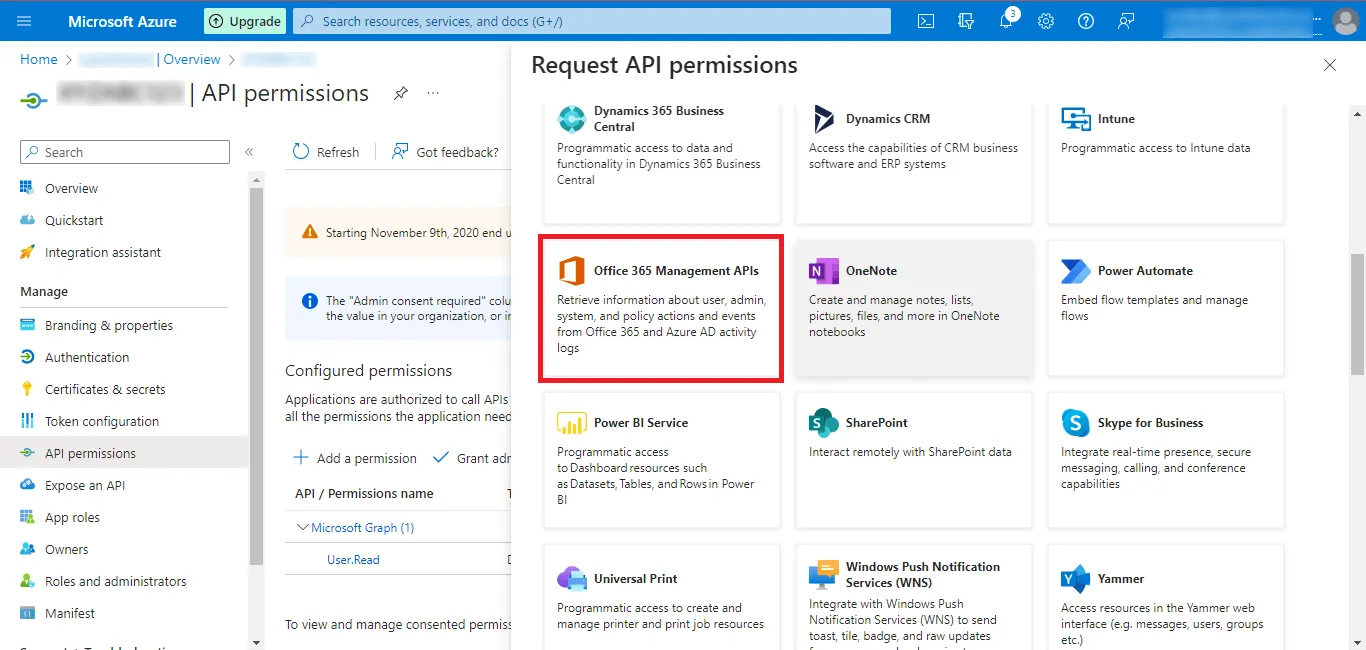
Step 22: Now click on the Office 365 Management APIs option.
Step 23: Then move to the APIs my organization uses tab.
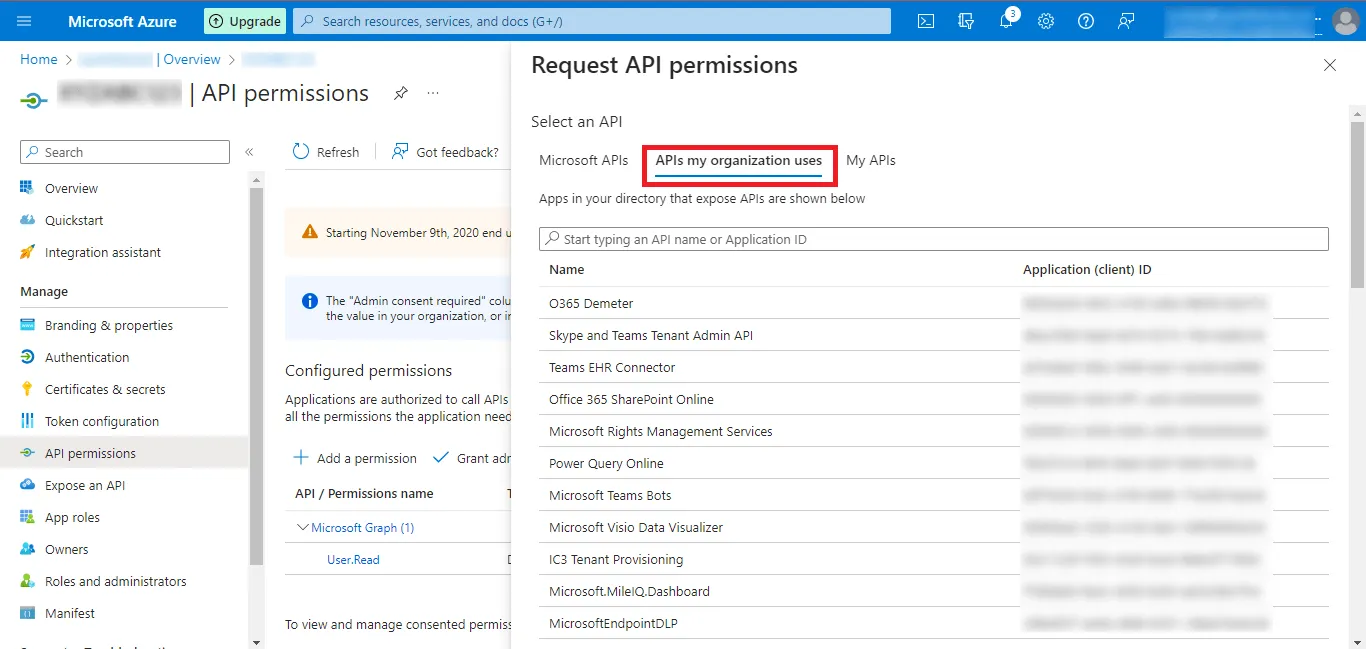
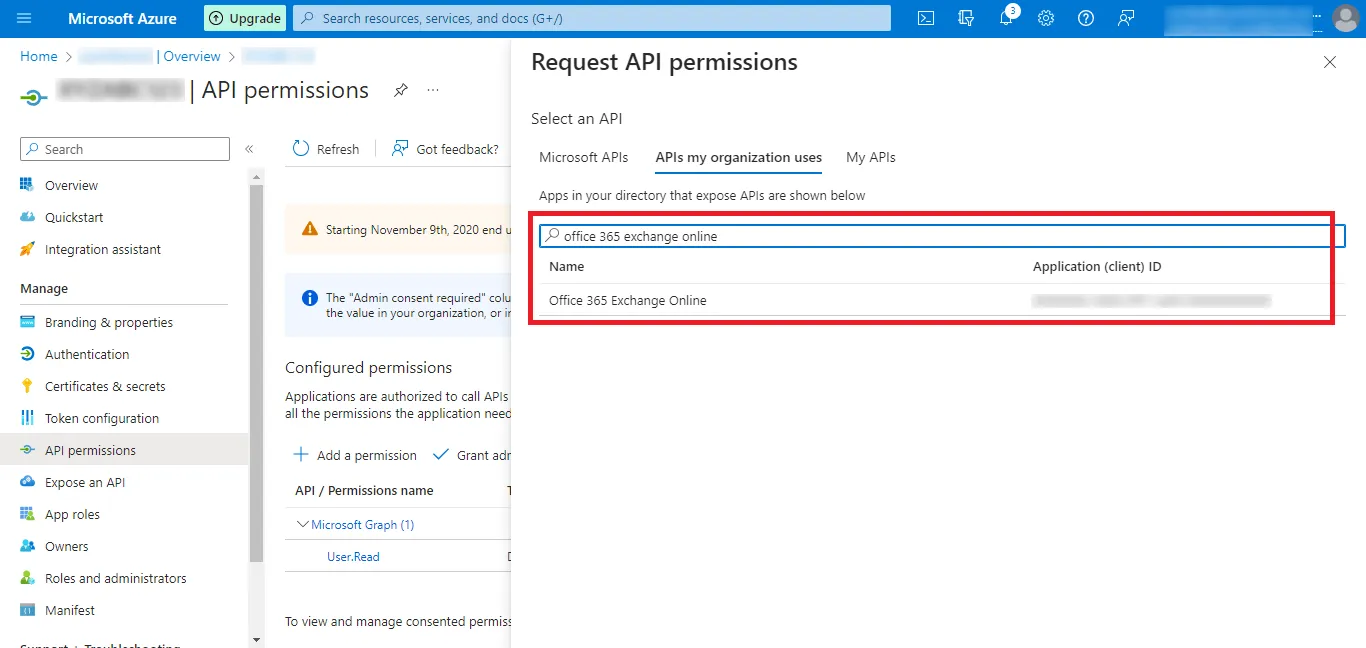
Step 24: Search for the Office 365 Exchange Online option and click on the search result that appears.
Step 25: Now Click on the Application permissions option.
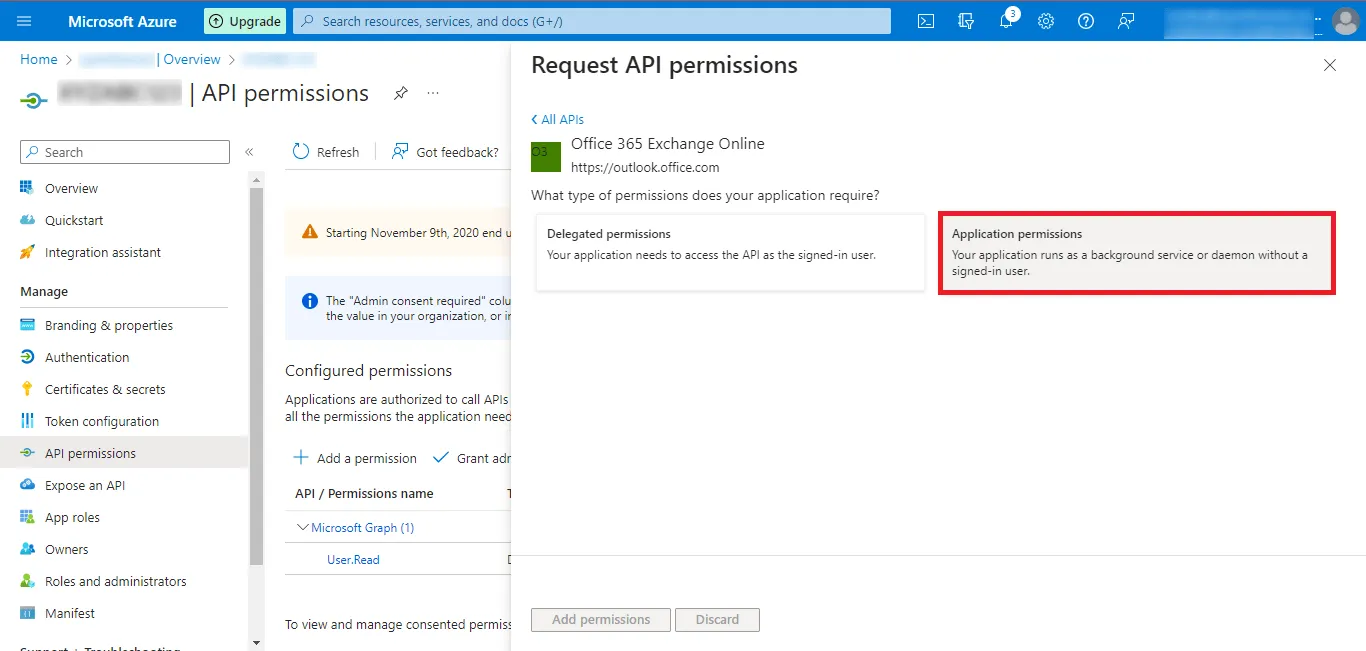
Give the Following Permissions in this Section as Given Below:-
| API/Permissions Name | Description | Admin consent required | Status |
|---|---|---|---|
| full_access_as_app | Use Exchange Web Services with Full Access to All Mailboxes | Yes | Granted for Project |
| Mail.ReadWrite | Read and write mail in all mailboxes | Yes | Granted for Project |
| Tasks.ReadWrite | Read and write tasks in all mailboxes | Yes | Granted for Project |
Step 26: After Adding the Permissions, you can see that the Status is Not Granted. So, click on the Grant admin consent for “YourAccount” option.

Step 27: Click on Yes and the Status will change to Granted.

Step 28: Finally, you have created Azure Active Directory Application and Enabled Necessary API Permissions.